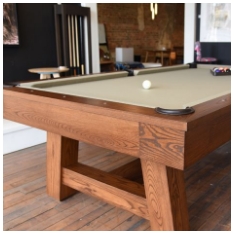
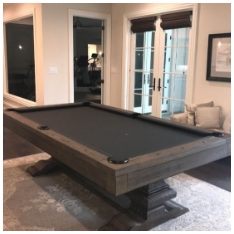
Setting up a pool table can seem like a daunting task, but with the right tools and guidance, it becomes a manageable project. In this guide, we’ll provide detailed instructions to help you assemble, level, and prepare your pool table for play. Follow these steps to ensure your table is ready for years of enjoyment
Tools and Materials Needed
Before starting, gather the following tools and materials:
- Wrenches and screwdrivers
- Leveling tools (spirit level or digital level)
- Shims or a leveling kit
- Beeswax or wood filler (for seams)
- Measuring tape
- Adhesive for slate seams
Having everything ready beforehand will save you time and effort during the pool table setup process.
Step 1: Choose the Right Location
The first step in setting up a pool table is selecting the best location. Here are some key considerations:
- Space Requirements: Ensure the room has enough space to accommodate the table and allow players to move freely. For a standard 8-foot table, a room size of at least 13’ x 16’ is ideal.
- Floor Stability: Choose a location with a sturdy, even floor to support the table’s weight.
- Lighting: Good lighting enhances gameplay, so consider installing a dedicated fixture above the table.
Step 2: Assemble the Frame
The table frame serves as the foundation, so assembling it correctly is crucial:
- Lay out all components and confirm that all parts are included in the package.
- Attach the legs to the frame using bolts or screws provided.
- Tighten all connections securely with a wrench to ensure stability.
- Position the frame in the chosen location, leaving enough room to make adjustments.
Step 3: Position and Install the Slate
Most pool tables use slate as the playing surface due to its durability and smoothness. Follow these steps to install the slate:
- Place the Slate Pieces: Carefully lift and position the slate pieces onto the frame. Use help, as slate is heavy and fragile.
- Align the Seams: Ensure the seams between the slate pieces are as tight as possible.
- Fill the Seams: Use beeswax or wood filler to seal the seams. Smooth out the material with a scraper or putty knife, ensuring a flat surface.
- Secure the Slate: Attach the slate to the frame using screws or brackets as instructed in the manual.
Step 4: Level the Table
A level playing surface is essential for a fair game. Here’s how to level the table:
- Check the Level: Place a spirit or digital level on the slate to check for unevenness.
- Adjust the Legs: Use shims or a leveling kit to adjust the height of the table legs. Make small adjustments and recheck the level after each change.
- Fine-Tune the Slate: If necessary, make minor adjustments to the slate using additional shims.
Step 5: Attach the Rails and Pockets
The rails and pockets are critical components of the table. Install them carefully:
- Install the Rails: Secure the rails to the table using bolts or screws. Ensure they are tightly attached to avoid movement during play.
- Attach the Pockets: Fix the pockets to the corners and sides of the table. Check that they are aligned correctly with the rails.
Step 6: Apply the Felt
The felt (or cloth) provides a smooth surface for gameplay. To apply it:
- Stretch the Felt: Lay the felt over the slate and stretch it evenly to avoid wrinkles.
- Secure the Edges: Staple or glue the felt to the underside of the slate, following the manufacturer’s instructions.
- Smooth the Surface: Use a flat tool to remove any bubbles or uneven areas in the felt.
Step 7: Final Adjustments
Before you start playing, make some final checks:
- Recheck the Level: Confirm the table is still level after completing assembly.
- Inspect the Felt: Ensure the felt is free of debris and tightly secured.
- Test the Rails: Bounce a ball off the rails to check for proper rebound.
Step 8: Test Play
Roll a few balls across the table to verify smoothness and accuracy. If you notice any issues, make further adjustments to the level or felt as needed.
Maintenance Tips
Once your pool table is set up, regular maintenance will keep it in top condition:
- Clean the felt with a soft brush to remove dust.
- Avoid placing heavy objects on the table to prevent damage.
- Periodically check the table’s level and make adjustments if necessary.
Conclusion
Setting up a pool table requires careful planning and attention to detail, but the result is well worth the effort. By following these step-by-step instructions, you’ll have a perfectly assembled and leveled table ready for play. Enjoy your new addition and the countless games it will bring to your home!


