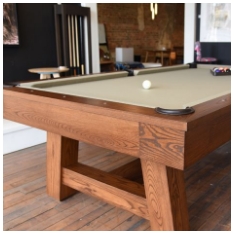
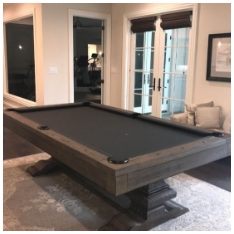
Installing a pool table is only part of the process. To ensure accurate gameplay and prevent the ball from rolling unfairly, the table must be perfectly level. Even a slight imbalance can affect your game. In this guide, we’ll explain how to level a pool table after installation, using simple and effective techniques.
Why Is Leveling a Pool Table Important?
A balanced pool table is essential for a fair and enjoyable game. If the table is uneven, the cue ball will drift toward one side, making it impossible to play properly. Proper leveling prevents unnecessary wear on the table surface and helps you maintain control over every shot.
Tools You Need to Level a Pool Table
Before starting the leveling process, gather the following tools:
-
Spirit level (preferably 48 inches or longer)
-
Carpenter’s level (optional but useful)
-
Shims (wooden or composite)
-
Wrench or screwdriver (depending on your table’s leg design)
-
Measuring tape
-
Soft cloth
These basic tools will allow you to make accurate adjustments without damaging the pool table.
How to Level a Pool Table After Installation
Step 1: Clean the Playing Surface
Before checking the level, wipe the playing surface with a soft cloth to remove dust and debris. Any small particles can affect the leveling process.
Step 2: Check the Initial Level
Place the spirit level in multiple positions on the table:
-
Along the length (head to foot)
-
Across the width (side to side)
-
Diagonally from corner to corner
This will help you identify which areas of the table are uneven.
Step 3: Adjust the Table Legs
Most modern pool tables come with adjustable leg levelers. If your table has them:
-
Turn the levelers clockwise to raise the table.
-
Turn them counterclockwise to lower the table.

Make small adjustments and recheck the level after each change. Start with one corner and move around the table systematically.
If your table does not have adjustable legs:
You can use shims under the legs to balance the table. Place a shim under the low side and continue checking the level until the table is even.
Step 4: Fine-Tune with a Carpenter’s Level
Once the main leveling is complete, use a smaller carpenter’s level to check the frame and playing surface more precisely. Pay close attention to the corners and sides of the table.
Step 5: Check the Slate Level (If Applicable)
Some pool tables have a slate surface divided into multiple pieces. If your table has a three-piece slate:
-
Remove the felt carefully.
-
Place the spirit level directly on each slate piece.
-
Adjust the slate screws slightly to ensure all pieces are even.
After leveling the slate, reapply the felt and ensure it is smooth without wrinkles.
Step 6: Test with a Cue Ball
Once you have adjusted the level, roll a cue ball gently in different directions:
-
From one end to the other
-
Side to side
-
Diagonally
Observe the movement. If the ball drifts without being hit, the table still needs adjustment. Continue leveling until the ball rolls straight.
Additional Tips for Maintaining a Level Pool Table
Keep the Floor in Good Condition
If the floor underneath your pool table shifts or settles over time, the table may become uneven again. Make sure the floor is solid and stable.
Regularly Check the Level
Pool tables can lose their balance over time due to:
-
Heavy use
-
Floor movement
-
Environmental factors (humidity and temperature changes)
It’s a good habit to check your pool table’s level every few months and make adjustments when needed.
Avoid Dragging or Moving the Table
If you need to move the pool table, even slightly, always disassemble it properly. Dragging or shifting the table without taking it apart can damage the frame, slate, and level.
Common Mistakes to Avoid When Leveling a Pool Table
Ignoring Small Imbalances
Even a slight tilt can affect gameplay. Always aim for precision when checking the level.
Over-Tightening Screws
When adjusting slate screws or leg levelers, avoid over-tightening. This can damage the table structure.
Using Inappropriate Shims
Only use shims made of wood, composite, or rubber. Metal shims can damage the floor and create instability.
Final Thoughts
Leveling a pool table after installation is a crucial step for an enjoyable and fair game experience. By following these simple and effective steps, you can ensure your table is balanced and ready for play. Regular checks and proper maintenance will help extend the lifespan of your pool table and keep your gameplay accurate.